Step 1: Ingredients & Materials
After two weeks your honey should be infused to it's maximum intensity.
•Honey
•Herbs and Spices to Flavor
•Tea Bags
•Honey Dipper**
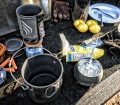
•Double Boiler
•Glass Jars with Lids
Step 2: Sterilize Your Jars
Fill a large pot with water. Place your jars and their lids inside the pot, submerging them in the water. Bring to a boil and continue to boil for 10 minutes. This will clean and sterilize your jars before you put your infused honey in them, reducing the risk of bacteria. Allow your jars to cool while you start to infuse your honey.
Step 3: Wash and Dry
Wash any herbs or fruit you may be using under a steady stream of cold water. Allow your washed items to dry. This will prevent bacteria from getting into your new batch of honey. You’ll also want to make sure that your herbs and/or fruit are completely dry before adding them to the honey, you don’t want any water in your finished honey.
Step 4: Prepare & Chop
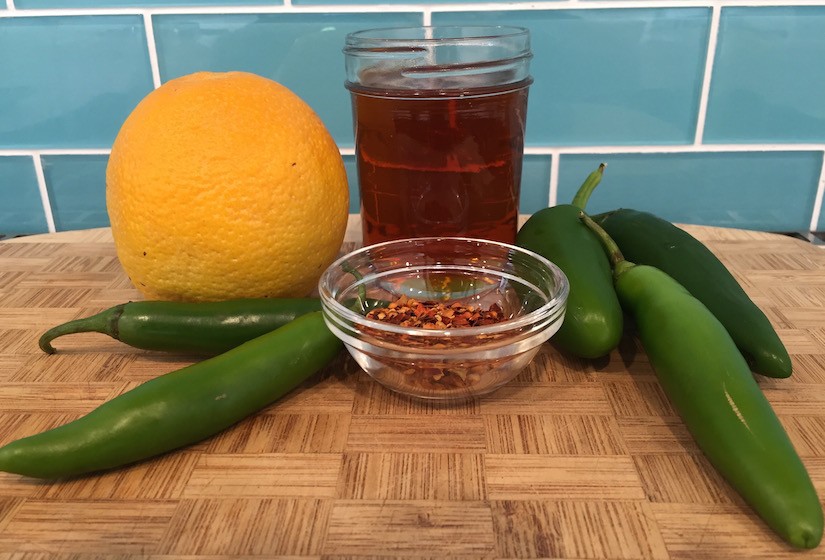
Hot Pepper Honey:
•1/2 Cup of Grade A Honey
•4-5 Chilies Chopped (aji amario/ padron/ serrano/ jalapeno/ dried chile flake)
•Zest from 1/2 of a Large Organic Navel Orange
Step 5: Tea Bags
You can steep your honey with loose herbs and spices but then you will have to strain your honey mixture at the end, or be okay with solids in your finished product. Instead, I prefer to place all of my herbs and spices for the infusion in a loose leaf tea bag. This will allow for the honey to soak in the aromatic flavors you’ve chosen, but also allow for easy removal when you are done.
For this step, place your prepared (chopped, muddled, or zested) herbs and spices in an empty loose leaf tea bag and twist the top to help the bag remained closed.
Step 6: Fast Infusion
This is technique #1: The Fast Infusion. This technique utilizes heat to help the honey quickly absorb the flavor profile of the herbs/spices that you are using to infuse with. It is beneficial in that it can be used in a pinch to create a flavored honey for a cheese plate or last minute dessert. It does however heat the honey, which can eliminate some of honey’s natural benefits. Nonetheless, it’s delicious and works wonderfully.
1.Set up your double broiler.
2.Pour ½ cup of Honey into your double broiler.
3.Add your tea bag of herbs and spices.
4.Slowly heat your honey until it reaches a temperature of 145F (60C). Keep your honey mixture steeping at 145F for 20 minutes.
5.Remove from heat and allow your honey to cool for 10 minutes.
6.Remove your tea bag from the honey.
7.Gently and carefully pour your honey into your sterilized jars.
8.Screw on the lid. You’re done!
Step 7: Slow Infusion
This is method #2: The Slow Infusion. This particular infusion will take up to 2 weeks for your honey to absorb the flavor profiles of the herbs and spices you are infusing.
1.Untwist your tea bag and tie a knot in it instead to secure your infusion spices and herbs.
2.Place your prepared tea bags into one of your sterilized jars.
3.Pour honey over the top of the tea bag, filling the jar.
4.Screw on your jar lid tightly.
5.Let your jar of honey sit for up to 2 weeks to absorb the flavors.
6.Invert your honey jar whenever your tea bag floats to the surface to keep your herbs and spices submerged and to mix the honey ever so slightly.
After two weeks your honey should be infused to it’s maximum intensity. Open your jar and remove your tea bag. Replace your jar lid, screwing it on tightly. You’re done!
» Camp Kitchen » Chile Infused Honey
About the Author: Hawk

Red Tailed Hawk (Buteo jamaicensis) is ubiquitous in North America. You can usually find this bird of prey riding thermals or sitting atop high places keenly observing open ground for a rabbit or rodent to eat. They get their name from for their reddish brown coloration on top of their tail feathers, but overall can have color variation based on regions and location.
Russell Jackson, the Hawk, Hails from Los Angeles, California and developed an early fascination for cooking by watching his mother prepare family dinners on the kitchen's match-lit stove. Intrigued, he made an early attempt at applesauce at age three and, in the process, launched a career experimenting in the kitchen.
Jackson left home at age 17 for the prestigious California Culinary Academy in San Francisco where he graduated with honors. Following graduation, he opened his first restaurant, Russell's, in Los Angeles. Chef Jackson also served as a personal chef during this time, counting A-list celebrities among his clientele. Throughout, he expanded his culinary oeuvre and learned the nuances of the restaurant business.
After nine years at Russell's, Chef Jackson again left Los Angeles and returned to San Francisco where his reputation, honed in Los Angeles, earned him the Head Chef role at the James Beard-nominated Black Cat. While applying his trademark approach developed at Russell's to the Black Cat, San Francisco culture began to shape Jackson's menu choices. It was during this time that Chef Jackson reunited with former colleagues and immersed himself in San Francisco's rich, cosmopolitan dining scene.
San Francisco's anti-authoritarian culture helped inspire his next and boldest move: SubCulture Dining (SCD), an underground dining club where the menu focused on sensible ingredients, many from Russell's own rooftop garden. SCD combined a darkly exciting atmosphere, a democratic application process, and a clientele ranging from worldly foodies to the young and inexperienced. SCD grew to win over San Francisco patrons, where the cozy atmosphere allowed Chef Jackson to use his distinctive personality to the best of his advantage.
In 2008, with SCD now a culinary institution, Chef Jackson sought a new challenge. That exploration became Lafitte, a San Francisco sparkler with a touch of culinary rebellion, beautifully situated on San Francisco's Embarcadero waterfront. Inspired by French brasseries and emphasizing local and fresh ingredients, Lafitte was Chef Jackson's stylistic counterpoint to SCD and showcased the more traditional side of Chef Jackson's style and fare.
Chef Jackson has twice entered the world of television. In 2013 he appeared on Iron Chef America where he battled Chef Jose Garces in a Rhubarb War. That same year Chef Jackson was a contestant on the hit reality show The Next Food Network Star where he became a fan favorite and finished third overall. In one memorable scene, having successfully created a bacon-candy product for a panel of food executives, one marketing executive noted his personality and skills, describing him as both endearing and bold, with a great television persona —a sentiment often echoed by the panel of judges that included Chefs Bobby Flay, Giada De Laurentiis, and Alton Brown.
Today, four restaurants launches later, and returning from the Food Network Kitchens, Chef Jackson remains active in the New York and San Francisco food scenes. SubCulture Dining is now a bi-coastal affair with a robust schedule and an ambitious agenda. He is currently working on new development projects in New York and San Francisco, and assists as a Board Member at WHED.org. Join him for his next culinary r(e)volution..

As soon as you heat your honey above 118F, you start to kill off all the beneficial stuff in the honey.
Infusion with dried materials, left to soak in the honey, is your best bet… unless you just want honey flavored syrup.
/Beekeeper.