This DIY hand pump conversion with the common 5gal / 20L Scepter Military Water Can is a highly useful mod for overlanding, road trips, the weekend picnic and even as part of your home disaster/emergency planning. Before we continue I must give credit to the original source of this idea. I first saw this DIY conversion topic on NorthWestOverlandSociety.org in 2009 or so, but this domain seems to have since been deactivated. Regardless, I wanted to acknowledge the original source and unknown author who originally published the idea.
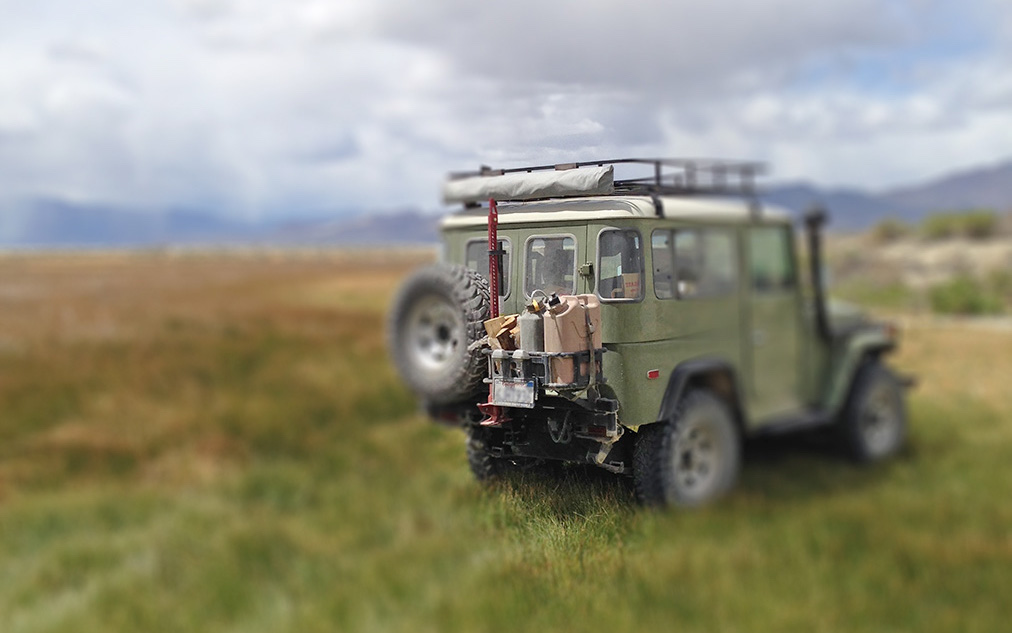
As anyone who has spent time in the field either on foot, or camping with a passenger sized vehicle, “running water” from plumbing as an amenity does not exist (unless you are in a RV park campground with hookups). Wild rivers, creeks and streams do not count, as it is poor etiquette to treat natural fresh water sources as your direct personal sink and in some cases for the truly inconsiderate, a toilet bowl. Having water that can flow from a faucet in a primitive campsite can make a notable difference in the ease and comfort in which you live at, enjoy and maintain your temporary outdoor home under the stars.
If there are two questions I am asked the most at any overland event, or rally with other campers, when I am seen using my converted water can are, “Where did you get that?”, or “How did you you do that?”. With this article I will demonstrate how this is done.
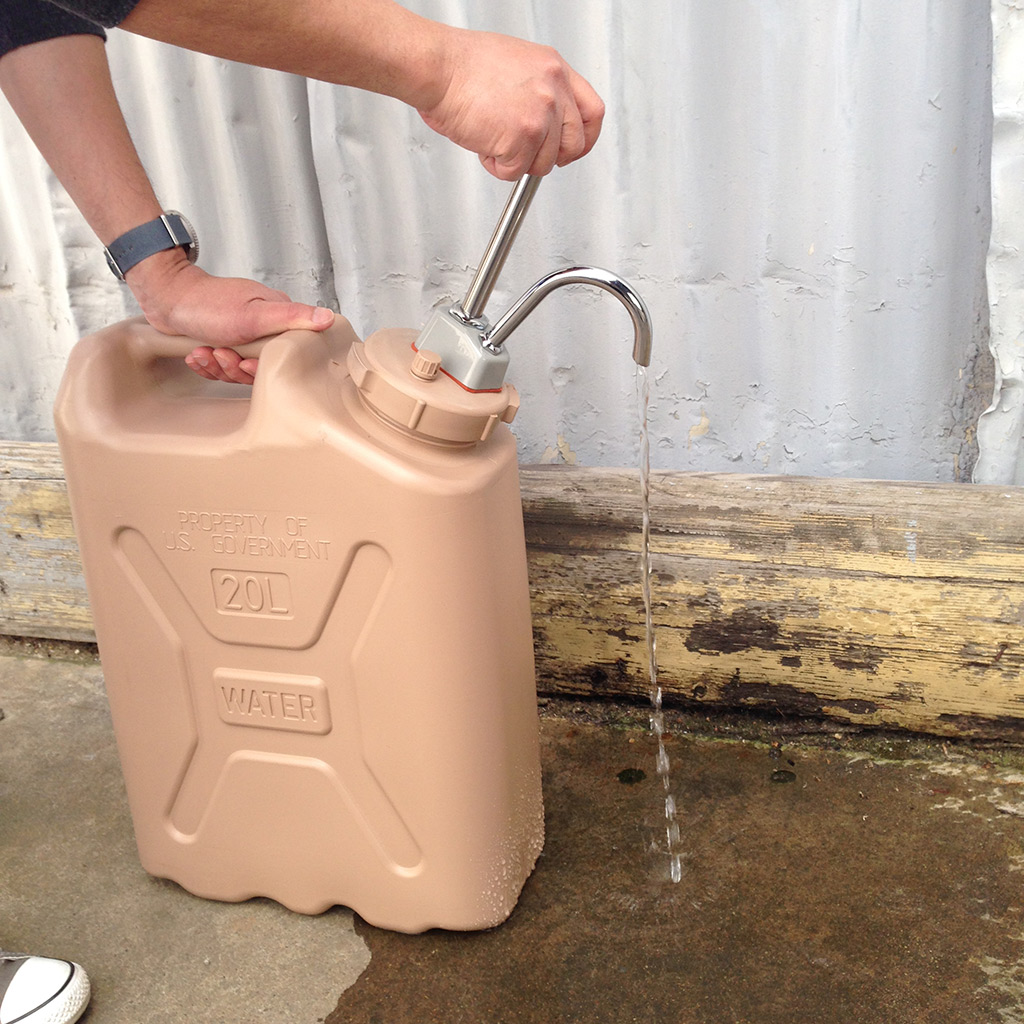
This DIY tutorial will show you how to make a simple, effective, and portable water faucet from a readily available Scepter Military Water Can. These water cans are military grade aka “Mil-Spec”, hence sturdy, built for the field, and very durable. The most common size from any number of online retailers, eBay, and many surplus stores, is 5gal / 20L. They are affordable, BPA-free, and store an amount of water that is a good balance of portability, mass, and usable volume. The type of pump being integrated into the water can in this tutorial is a marine grade boating product and allows for one-handed operation to dispense water with each stroke via the plunger style hand pump.
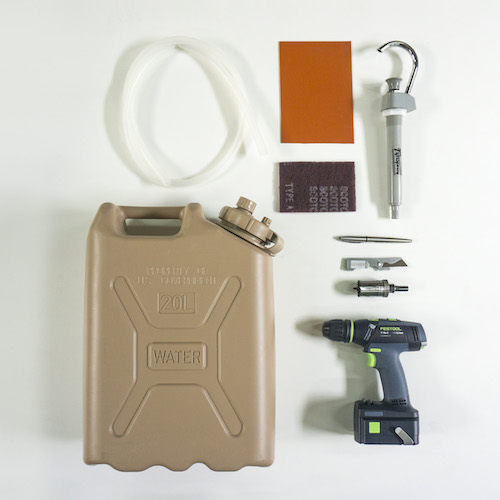
The following is a list of the materials, basic tools, and instructions you will need to complete this conversion. All these items can be purchased easily online. The priciest component will be the plunger style hand pump, and the model used here is a Fynspray Ultra Galley Pump (P/N WS67). At the time of this article the pump, which is a “basic” model in the world of “galley pumps”, is around $90-$120 USD online.
Components-Materials:
5gal / 20L Scepter Military Water Can, or clone.
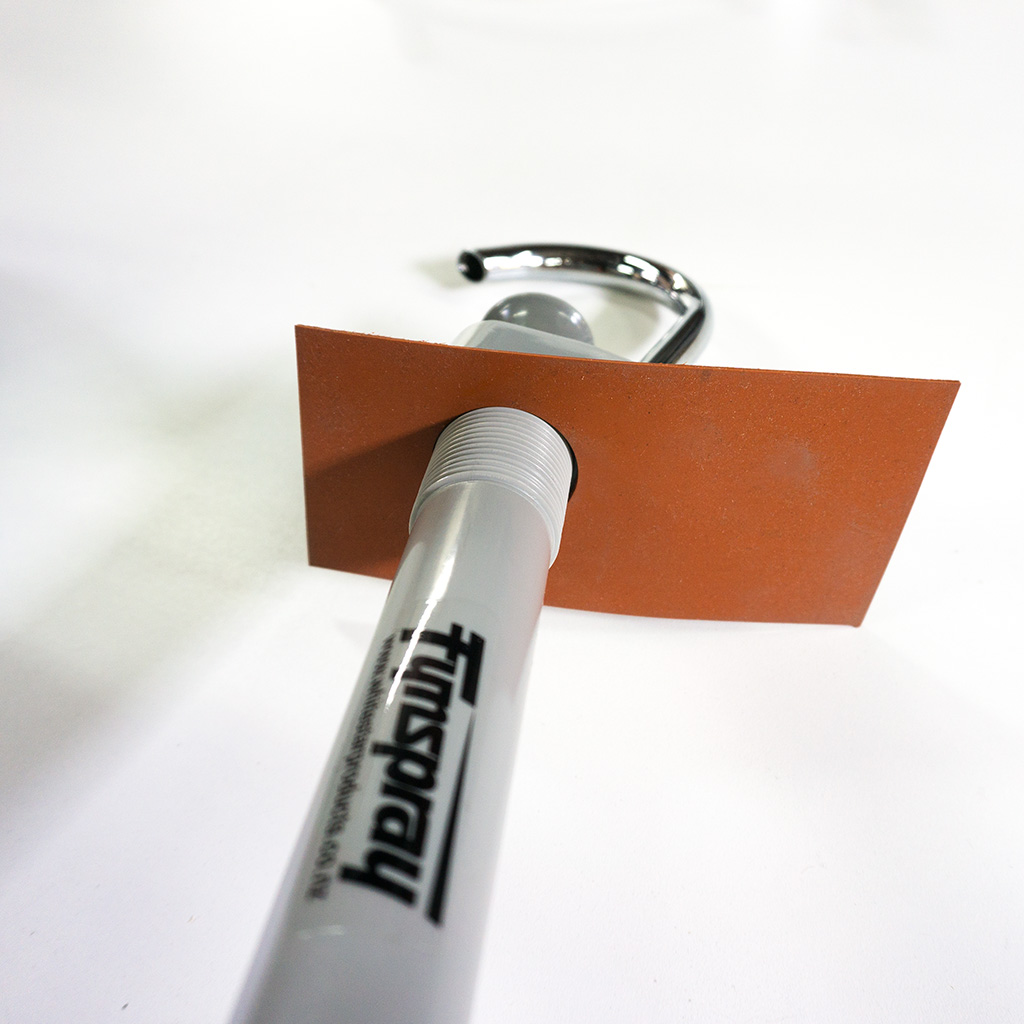
Fynspray Ultra Galley Pump, P/N WS67.
3” x 4” x ⅛” thick food grade sheet gasket or non-toxic closed cell foam.
16” x ⅝” OD ~ ½” ID food grade silicone tubing.
Tools:
Hand drill. *Or drill press if you have one available to use.
1 ⅜” diameter hole saw.
Utility knife.
Pencil, Sharpie, or other marking-writing implement.
Scotch-Brite™ General Purpose Hand Pad, or 150-220 grit sandpaper
*Danger Warning: Before you begin make sure to use the proper safety equipment such as safety glasses when using any tools and be planned and deliberate when handling and using any of your tools, especially any cutting tools like your utility knife.
Instructions:
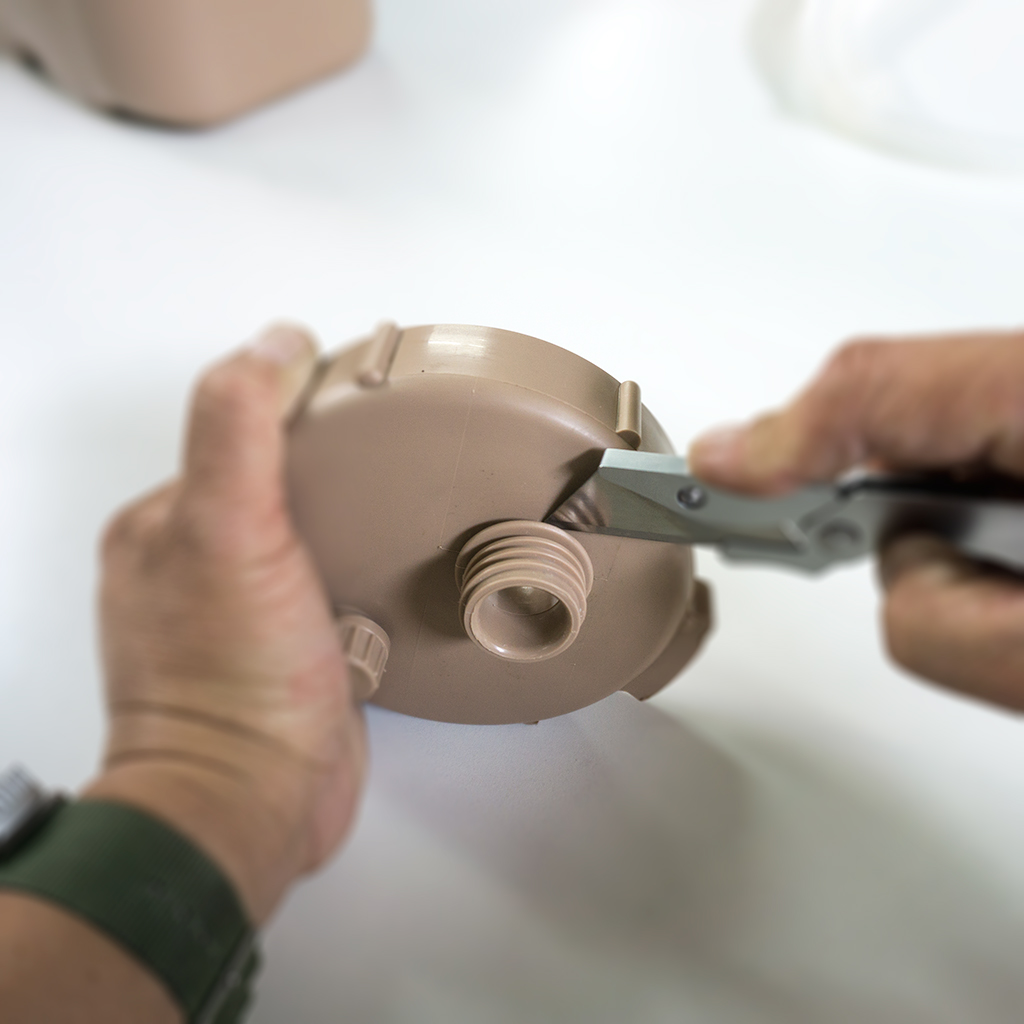
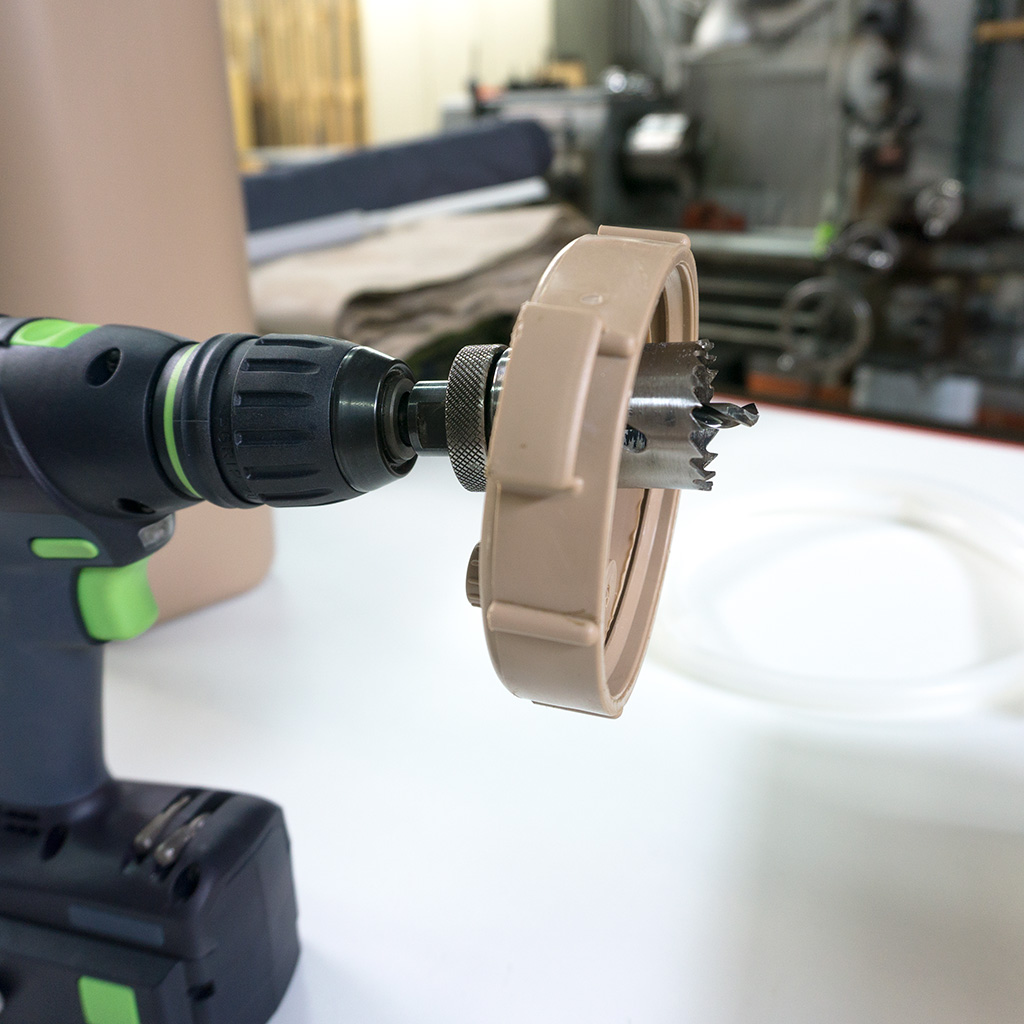
1) Unscrew the main cap from the water can and unfasten the cap retaining collar from the water can. You will be cutting off this retaining collar and also removing the spout cap and its smaller retaining collar.
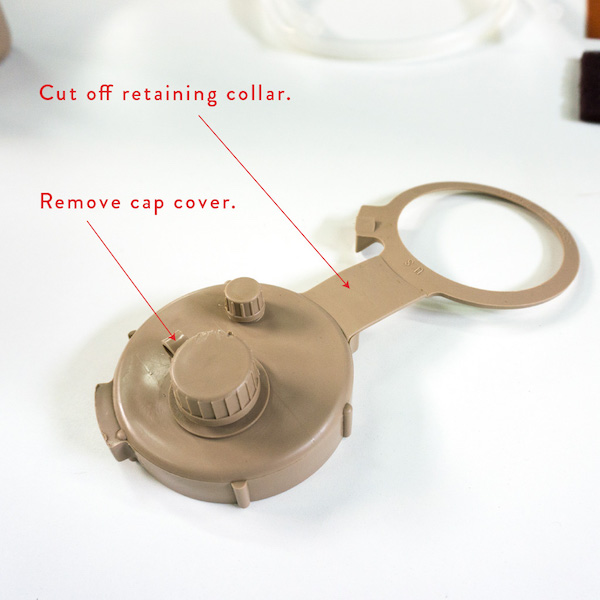
2) With your utility knife score the material of the retaining cap collar where it meets the cap.
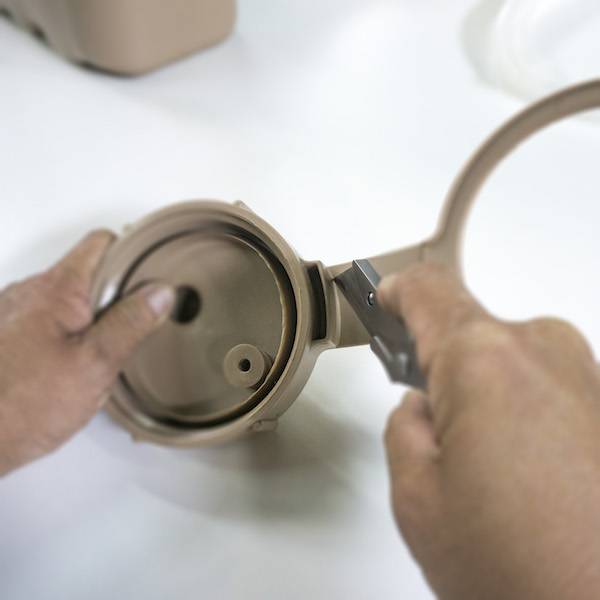
3) Bend at the score until the retaining collar separates from the cap.
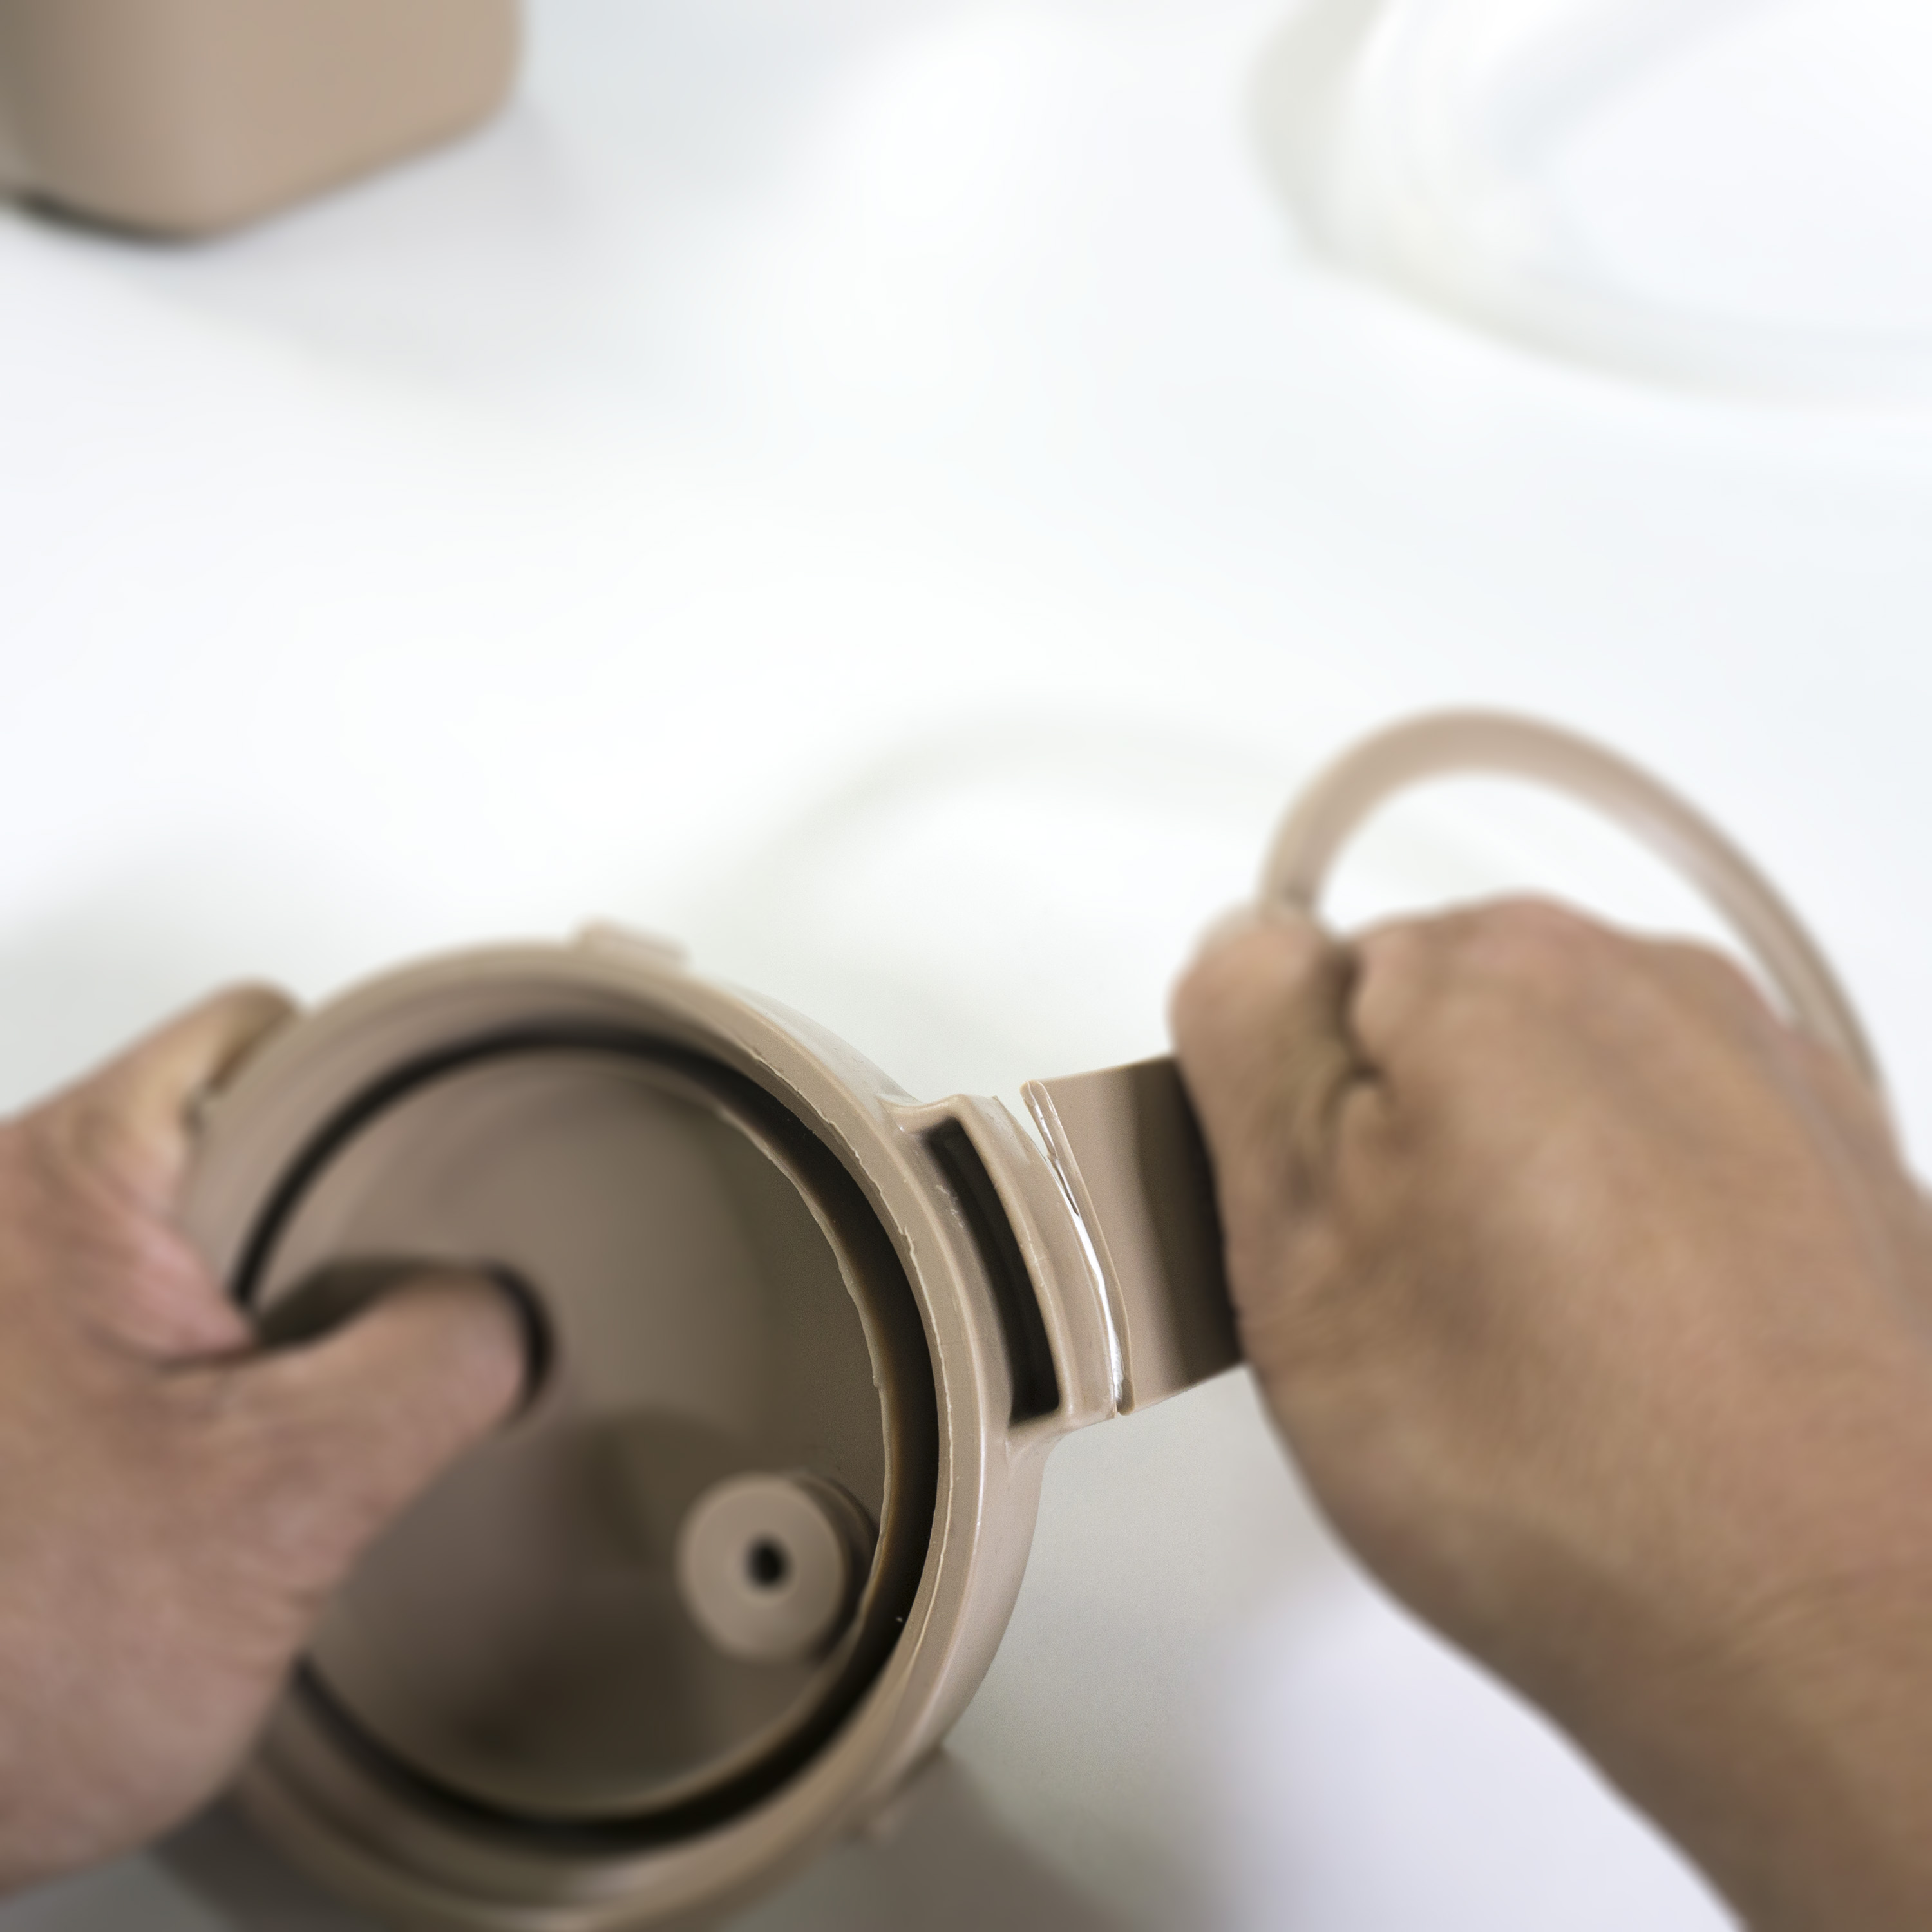
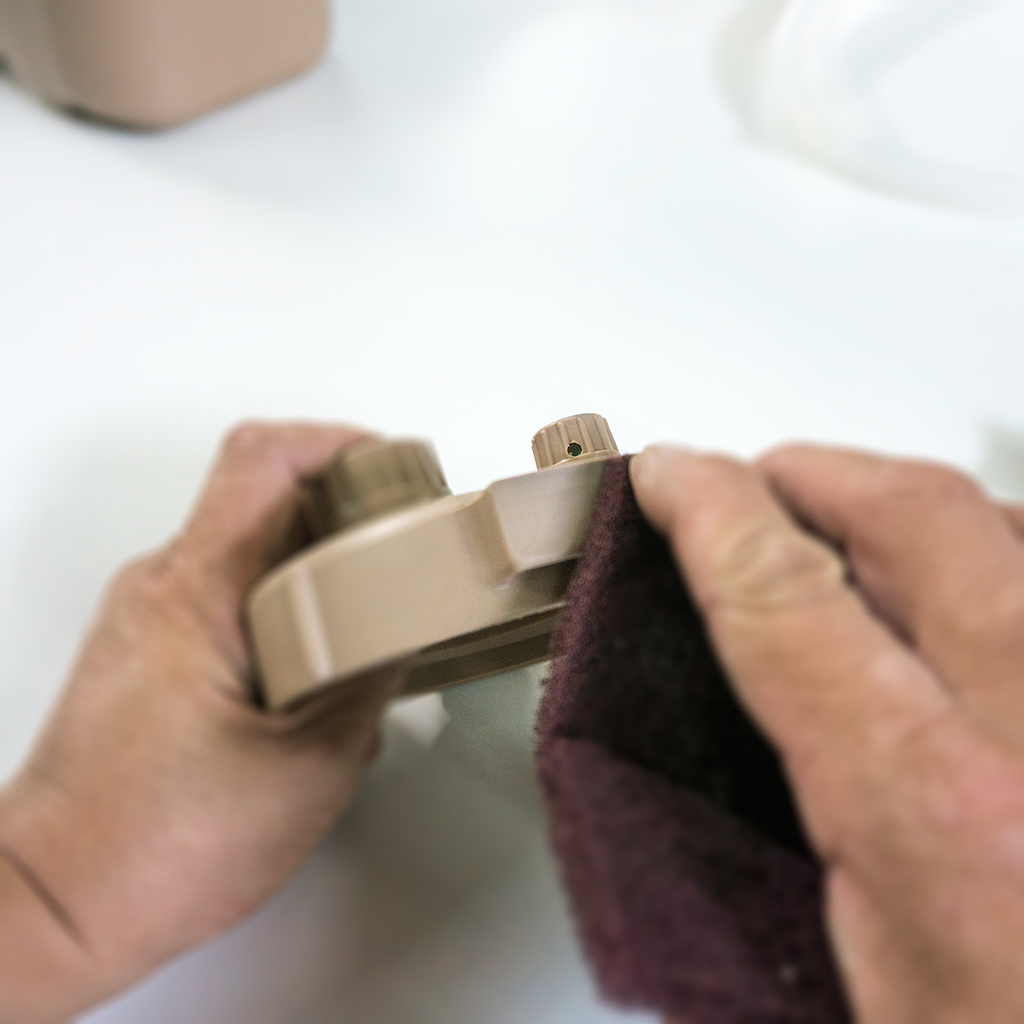
4) Use your utility knife to clean up any excess material and use Scotch-Brite pad to smooth out any rough edges as desired.
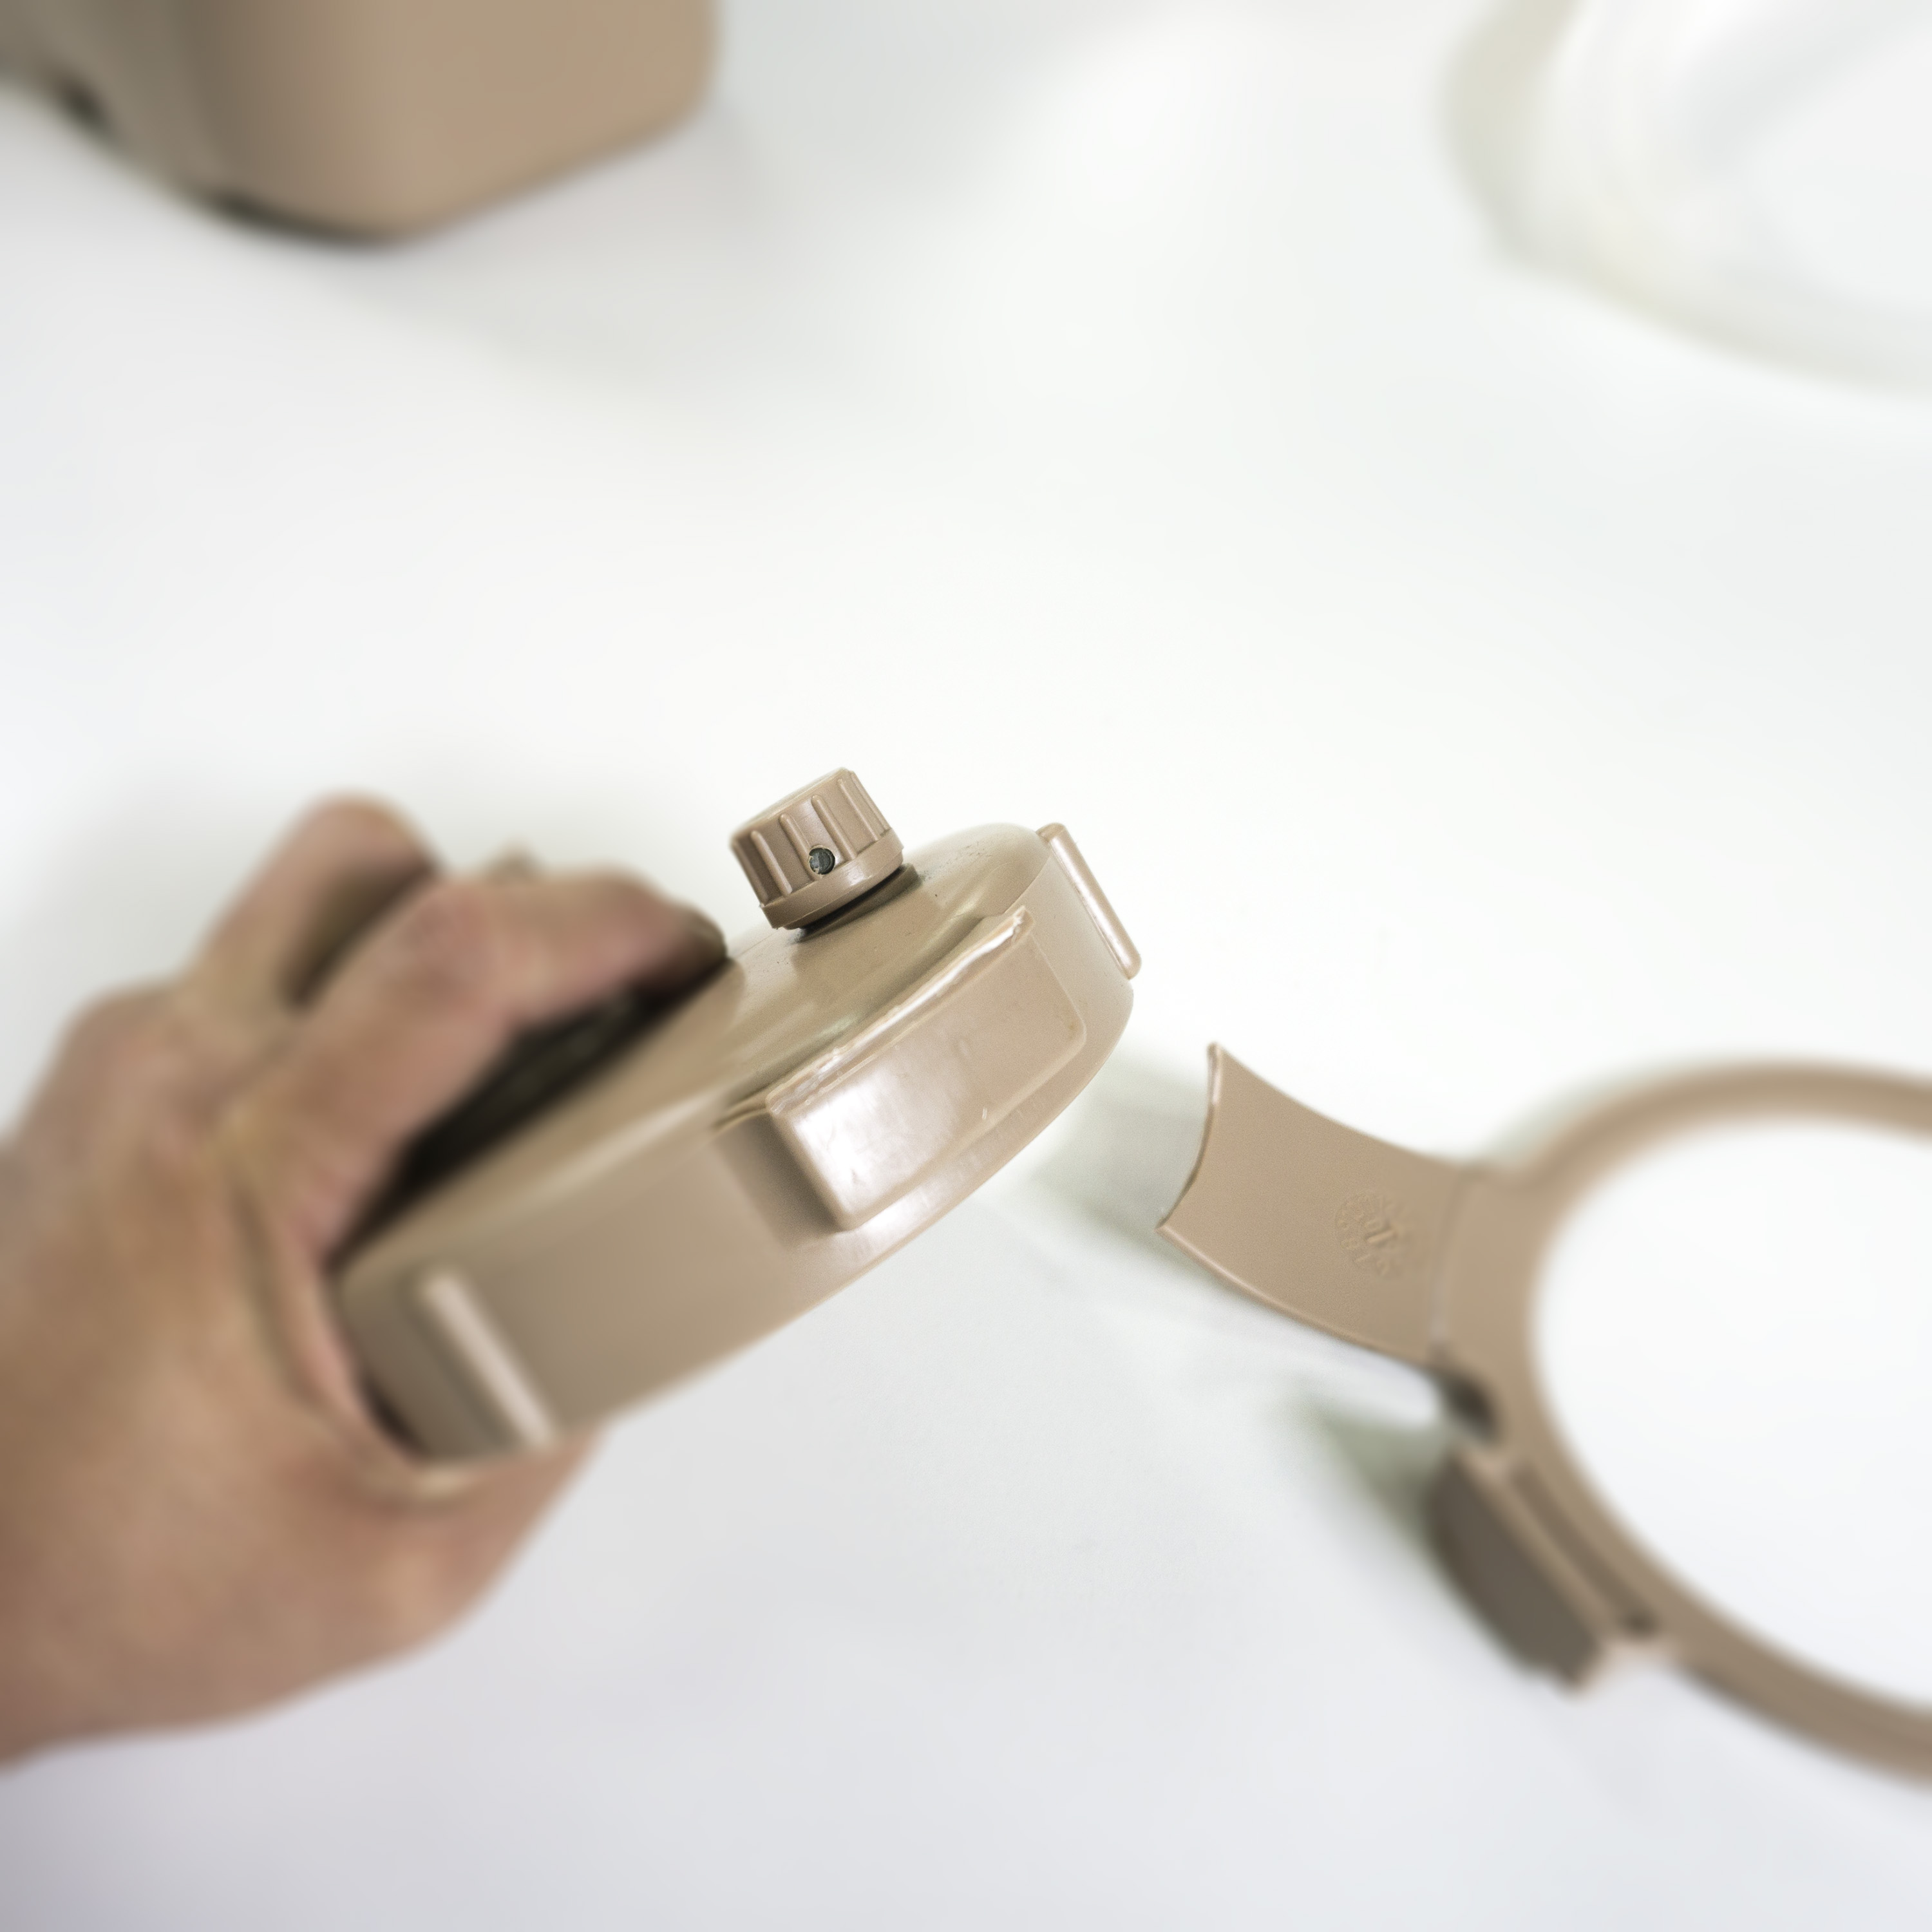
5) Use your utility knife again and score around the base of the spout where it meets the cap until you cut through and carefully work your way around the base to remove the spout.

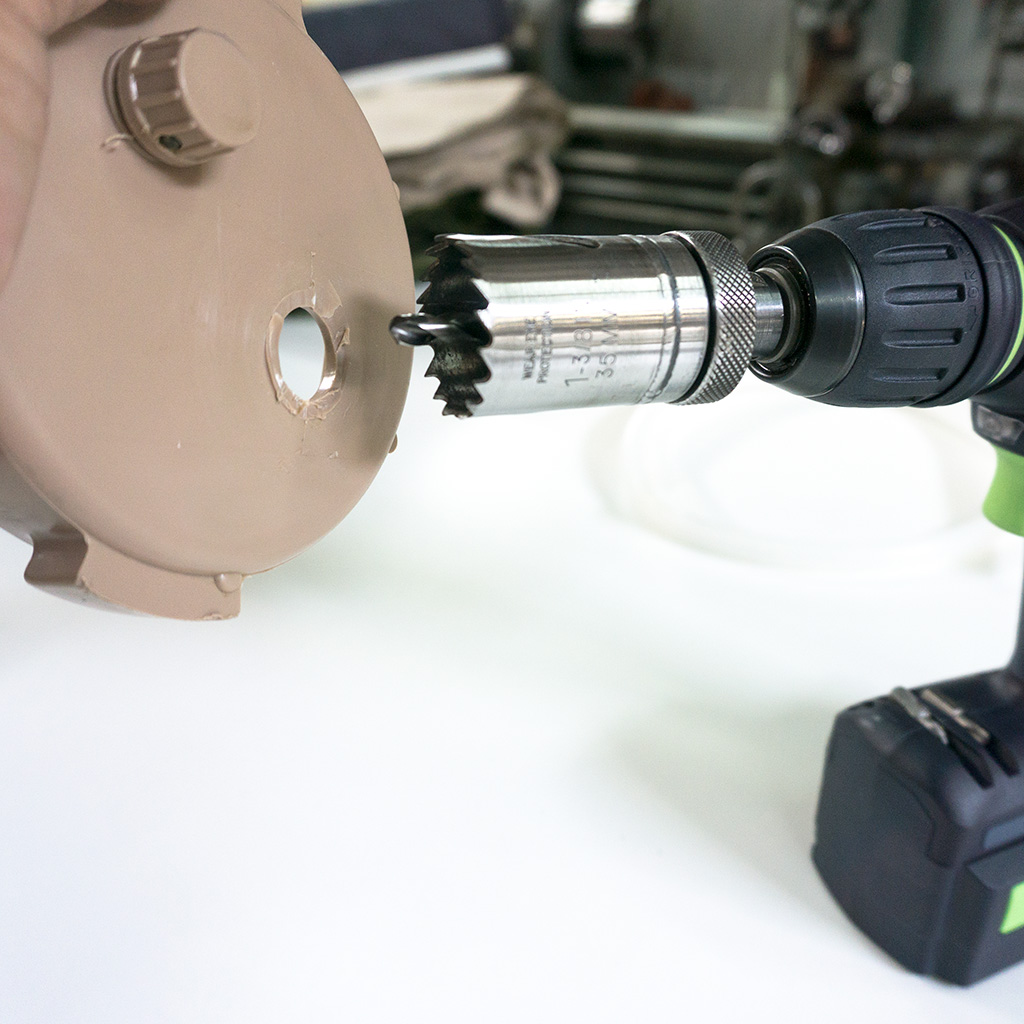
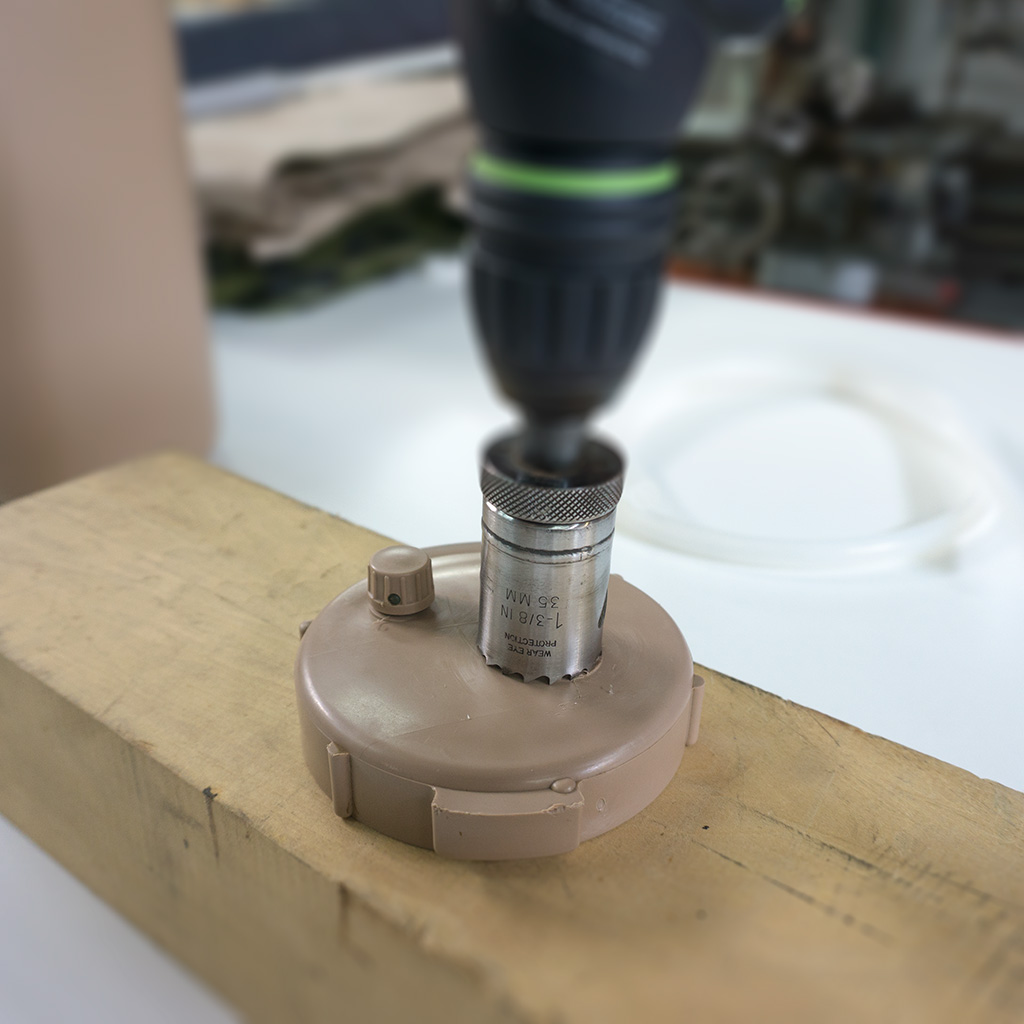
6) The 1 ⅜” hole saw can be used with a hand drill to cut and enlarge the necessary hole in the main cap to allow the hand pump neck to fit through. If you use a hand drill for this step, a finer toothed hole saw is easier to use. Make sure to use a wood block when you use your hand drill to backup the cap and a protective stop for the pilot drill and hole saw . Firmly hold the cap when using your hand drill. From the existing spout hole, the pilot drill bit should be as close the center of the main cap as possible. Do not eyeball the center of the spout hole to center your pilot drill bit when cutting. This is because you want to position the base of the pump over as much of the main cap as possible. Otherwise you may have part of the pump base hanging over the edge of the main cap when assembled.
Be extra careful when using the hand drill as the hole saw may “walk” over the cap when you start your cut. *A drill press is preferable if you have one to use. You can control the hole saw cut into the main cap more easily this way.
Use the Scotch-Brite pad or sandpaper to clean up any rough edges from the hole saw cut.
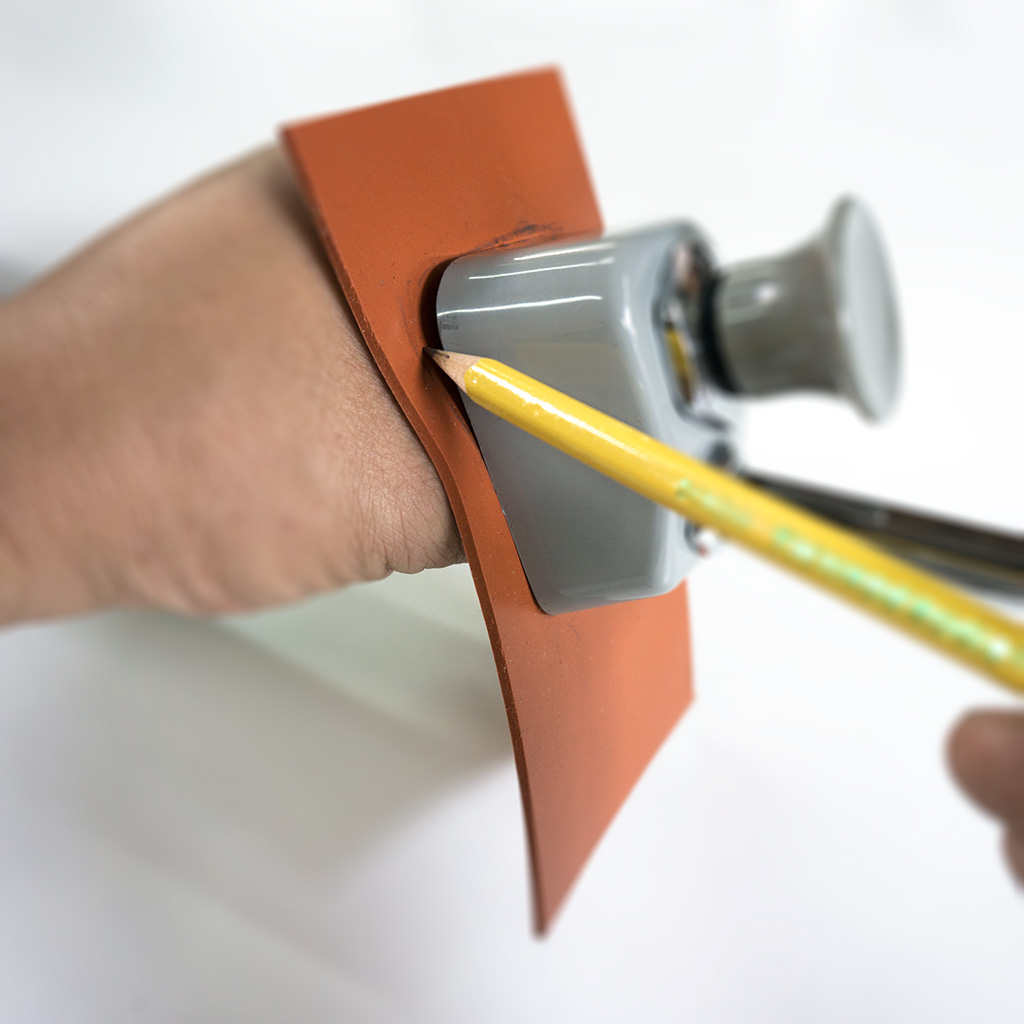
7) This step is extra and was not in the original tutorial I read. A ⅛” thick gasket between the base of the pump and the top of the main cap creates a better seat. Since the main cap is at a slight curve and the base of the pump is flat, the gasket serves as a slight pad for better fitting. I prefer ⅛” closed cell foam as it is more compressible and creates a better seat and fit between the pump base and top of the main cap when all assembled.
8) Use your marking implement again to trace around the base of the pump on the gasket. Remove the gasket and cut along the traced line to create this “pad”.
9) Cut your food grade silicone tubing to about 16”. This should be just the right length to fit over the bottom of the pump neck nipple and have the tubing sit at the bottom of your water can.
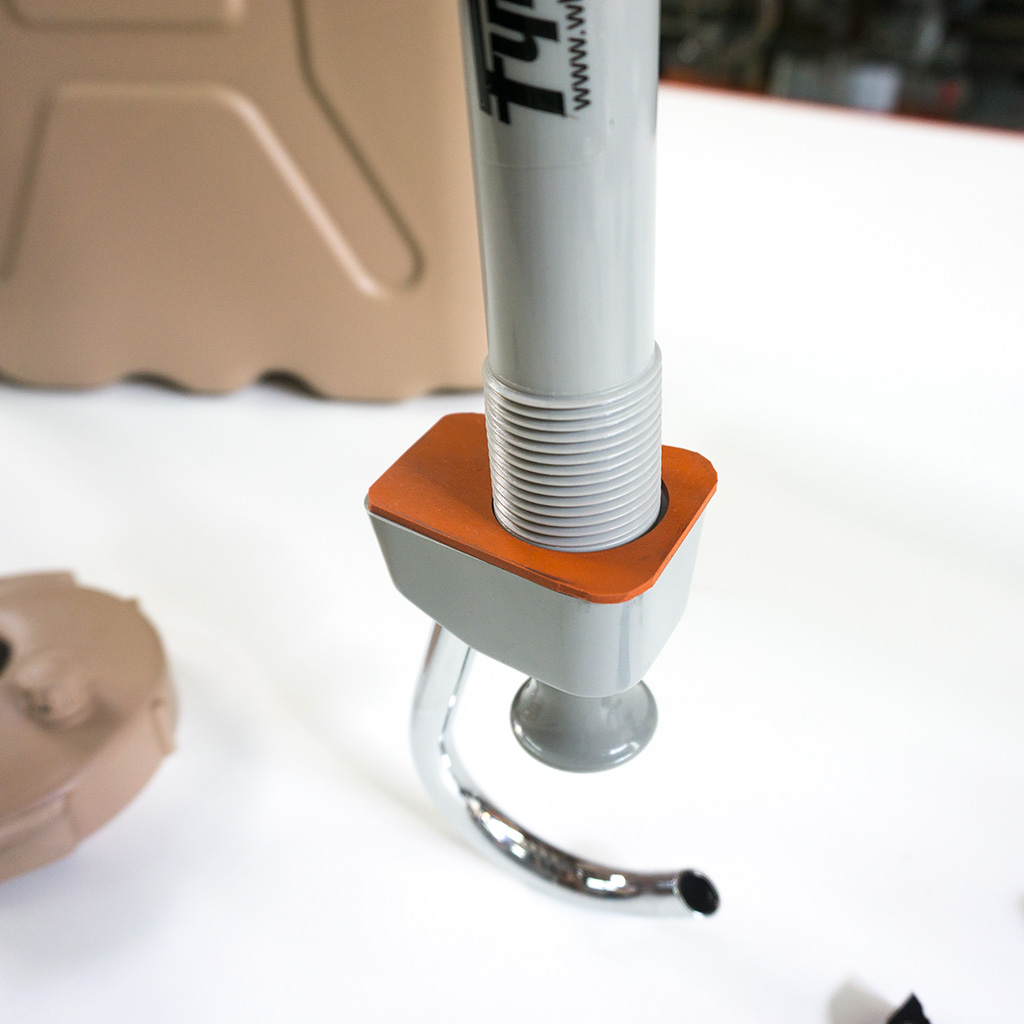
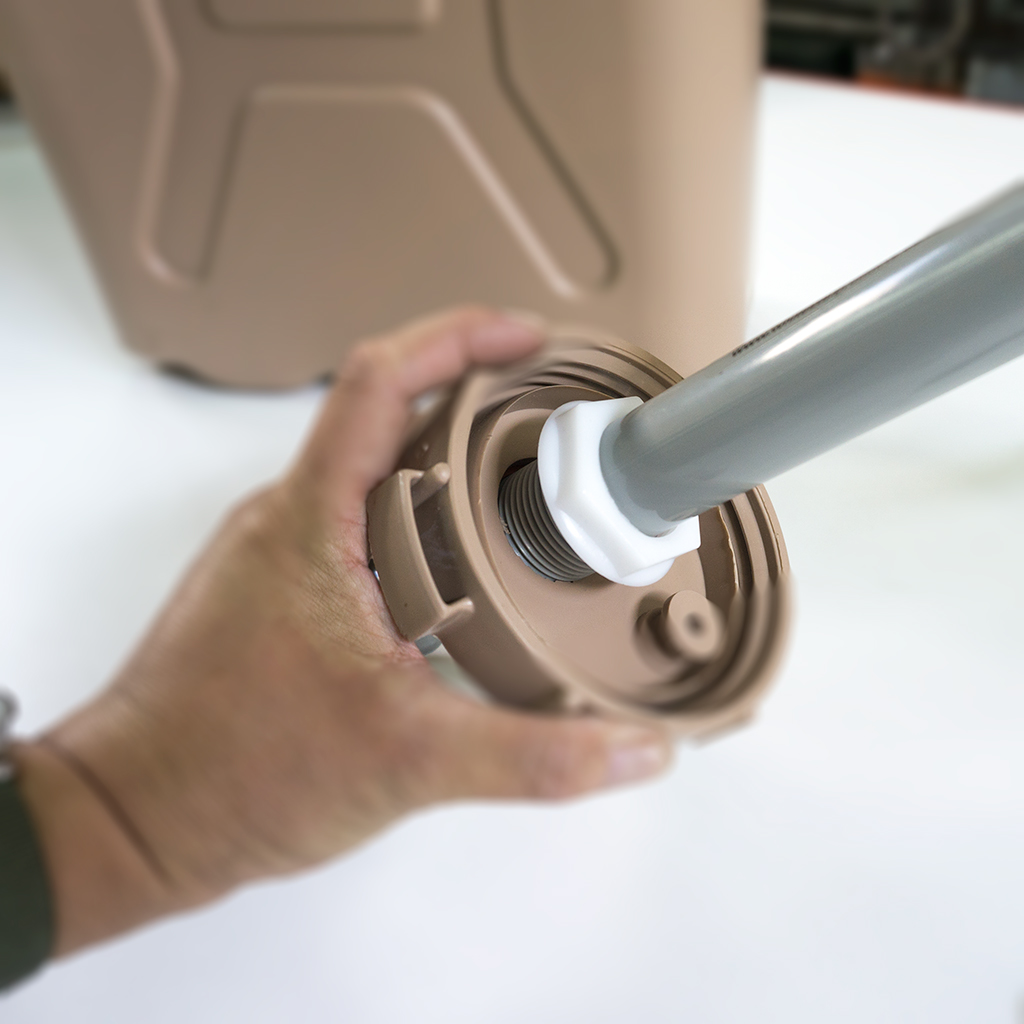
10) Unscrew the nylon nut-washer from the threaded part of the pump neck where it meets the bottom of the pump base. Insert your pump neck through the hole in the main cap and re-thread the nylon nut-washer so it is finger tight. You don’t want it all the way tight so when you thread the main cap back on the water can you can rotate the pump base in the best orientation on the main cap relative to where the main cap stops when screwed back down on the water can.
Unscrew the main cap from the water can and then tighten down the nylon nut-washer so it is snug and won’t budge.
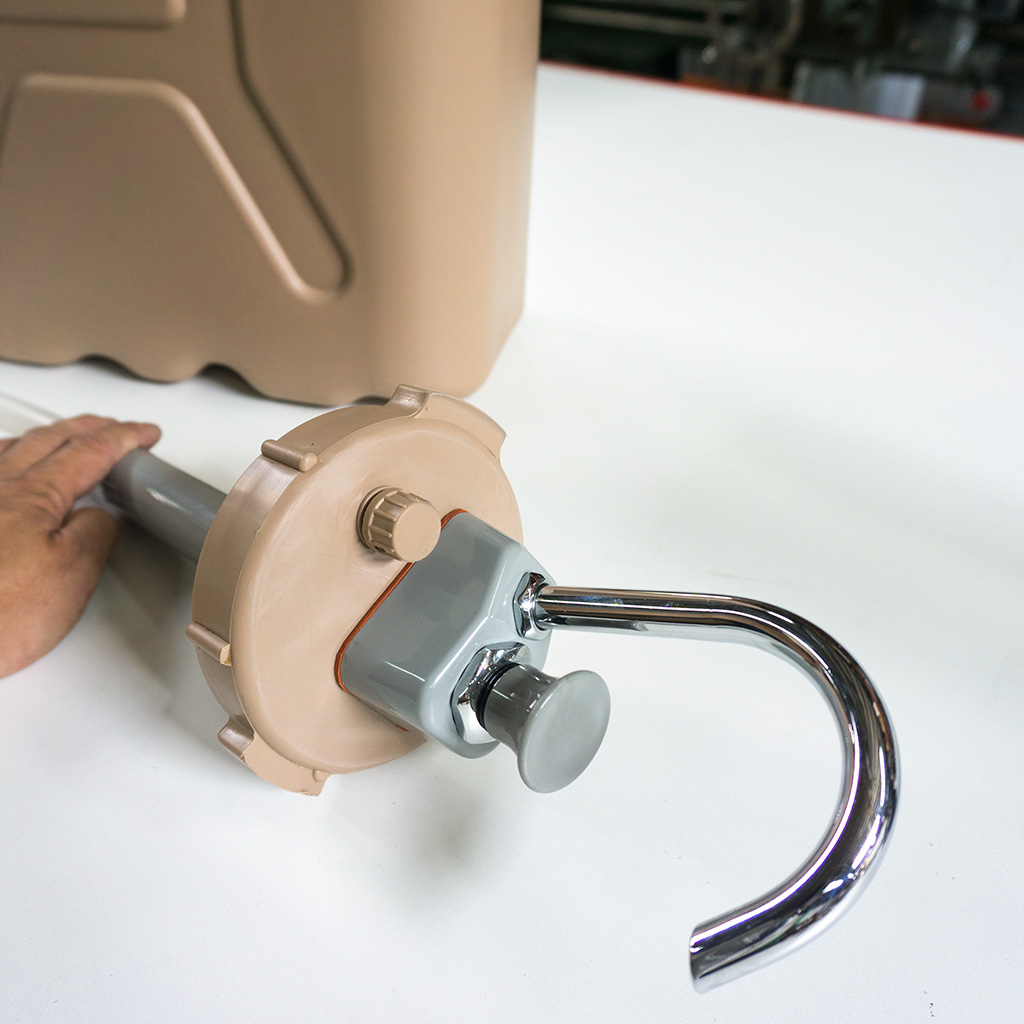
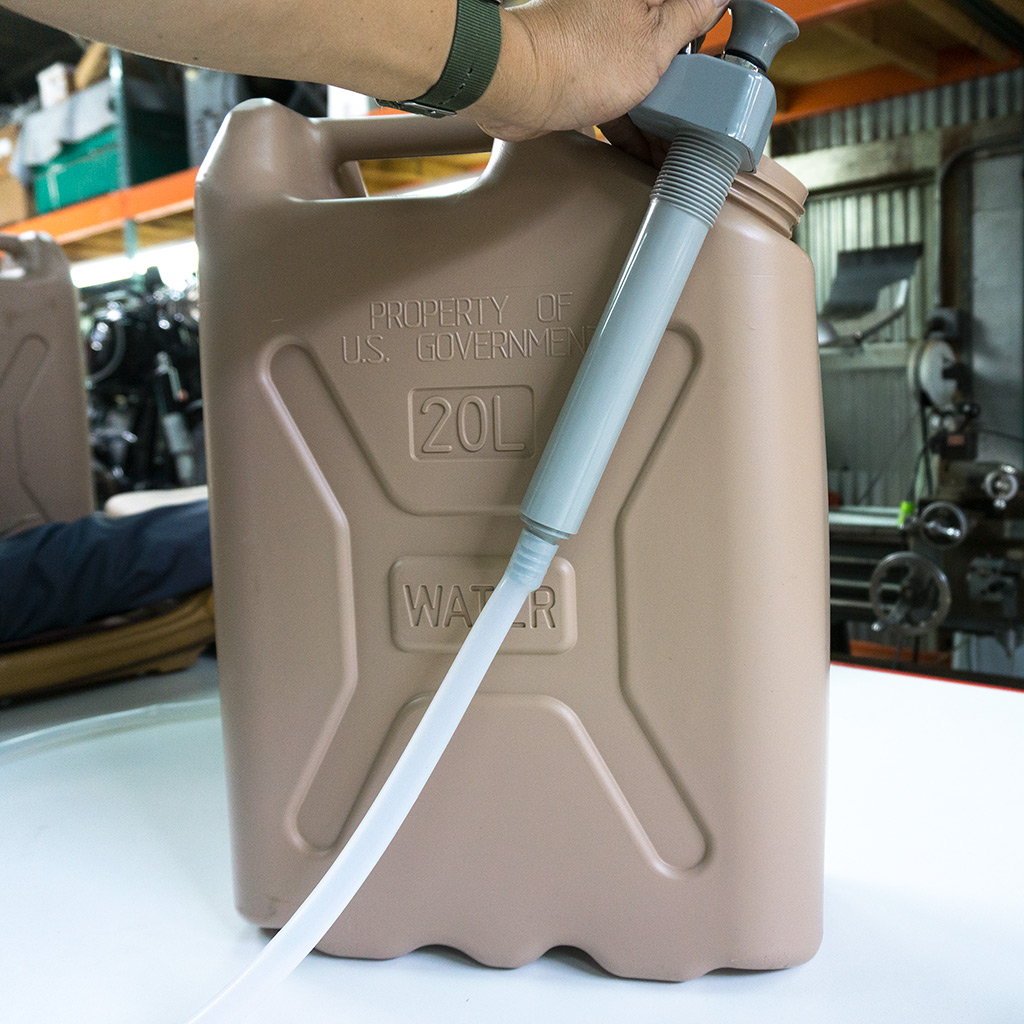
11) Rinse your whole assembly in clean hot water to wash away any debris and dust. Use dish soap to clean more thoroughly if you wish and rinse again with hot water. Once you have the pump rotated on the main cap in the best orientation, screw the main cap/pump assembly back on the water can and you’re all done! *For those of you who want to go the extra distance, you can also run a bead with silicone caulking around the base of the pump where it meets the cap. Not necessary but does finish it all off just the more nicely.

Note that the faucet rotates in the pump base to keep it out of the way when transporting. Rotate it out when in use.
Now you have your own portable water can with hand pump and faucet for your next adventure. This mod to your water can will be one of the best amenities to have at your campsite and be the envy of all your friends. Now get outside and enjoy! Live wild, wise and free my friends!